
How to use Travel Expenses+
Installing & using the add-on
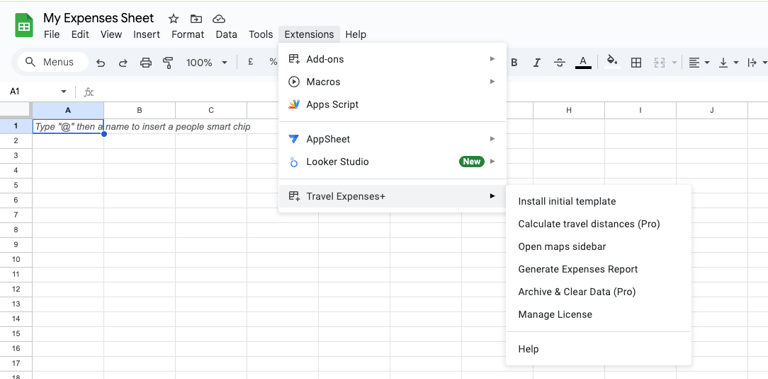
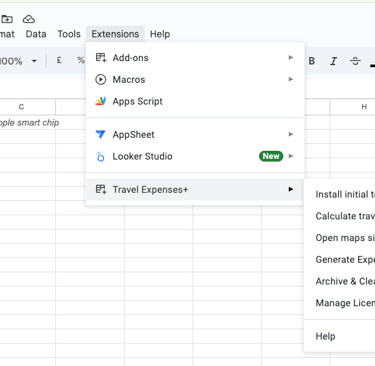
The add-on functions are found in the bottom section of the Extensions menu in your google sheets
Install Travel Expenses+ from the Google Workspace Marketplace - Link Here. Just hit the install button and follow the simple steps.
The first time you run the add-on you will be asked to agree to a number of permissions. These define what Travel Expenses+ needs to access in your sheet in order to function properly.
Whilst the specifics of these are defined on the authorisation page, more information is also available in our privacy policy
Installing the add-on
Agreeing to permissions
Using the functions
Setting up the template
You will likely wish to start by installing the template. In the Travel Expense+ menu click 'Install initial template'
A sidebar will open with specific instructions. Read the instuctions and click the blue 'Setup Travel Expenses+ Template' button.
It'll ask you to confirm you're okay with making a copy (don't worry about the empty script it mentions).
A new file with the Travel Expenses+ Add-on installed will open

Purchasing pro licenses
To use the pro features (calculating mileage and archiving data) you will need to upgrade by purchasing a license. This can be sone under the 'Manage License' menu
License Status
Here is information about your license, importantly whether the license is currently active or inactive and when it is due to expire. An active license will appear in a green box whilst an inactive one will be red.
Activate License
When you have purchased a license, enter it into this box and press the 'Activate License' button. Once activated, your partial license should show in this box.
Purchase License
Clicking the 'Purchase License' button will take you to the purchase screen. You can pay with card, Google Pay, or PayPal.
After you pay, you can open a page with your license key ready to copy. It will also be emailed to you with your invoice.
Paste the key into your Manage License sidebar and click 'Activate'

Maps sidebar
Travel Expenses+ includes a useful maps sidebar found under the Open maps sidebar menu. This helps you confirm that the location you have entered into the cell is correctly in the place you expected.
NB it is not essential to use the maps sidebar, it exists to help you confirm locations in the event that mileage calculations seem incorrect.

With a location entered in a cell, select the Open maps sidebar function. The map will open, centred on the location in the currently selected cell.
If the location is not what you expected you can:
Search for the correct place in the top search bar.
Or navigate to the correct place using the map.
Use the CNTL (⌘ on a mac) + mouse wheel to scroll in and out of the map.
Clicking a location in the map will add it to the 'Selected Location' field.
The 'Update Cell' button will add your selected location into the active cell of your sheet
Calculating mileage
Once you have filled the 'Mileage Breakdown' tab with the details of your journeys, calculating the mileage and expenses is as simple as clicking:
Calculate travel distances (pro)
Following the expiry of your free trial, you will need to subscribe to a license for this feature to work. See below for further details on this.
Cost per mile: The template's default value for this is £0.45/mile for cars and £0.20 for bicycles. This can be manually changed in the 'Instructions and Settings' tab. Leaving the vehicle column blank will default to the cost per mile for cars.

Adding other expenses
Other expenses can be easily added in the Other Expenses tab

Generating & sharing expense forms
The 'Generate Expenses Report' menu merges both sheets to the Downloadable Form sheet.
confirm who haven't added or modified any uncalculated mileages.
The name can be set in the Instructions & Settings tab.
Any amount already advanced can be added manually in the green cell next to 'Cash Advance'
This form can be customised in the green area at the top of the page and can be emailed or downloaded under the 'File' menu at the top.
This can be printed or emailed from the File menu.

Archiving & clearing data
At the end of each accounting period, clearing the template of old data and preparing it for the next is as simple as clicking:
Clear data & archive (pro)
This records the current merged expenses data into the 'Archive' tab before restoring the other tabs to their empty state (Downloadable Form will be updated the next time you generate an expenses report)
Following the free trial, this feature also requires a license - see below for support
